Want faster load times, better security, and free CDN for your website? This step-by-step guide from MH Host BD will show you how to integrate Cloudflare with your domain — the right way!
Cloudflare not only protects your site from DDoS attacks but also improves performance using its worldwide CDN network. Let’s set it up for your domain.
✅ Two Ways to Enable Cloudflare for Your Domain
1. CNAME Setup (Advanced)
- Only available for Business or Enterprise Cloudflare plans.
- Best for subdomains like www.domain.com.
- Not recommended for standard users.
2. Nameserver Setup (Recommended for All MH Host BD Users)
- Free and beginner-friendly.
- Works with all plans at MH Host BD.
- Involves updating your domain’s nameservers to point to Cloudflare.
🛠️ How to Add Your Domain to Cloudflare – MH Host BD Tutorial
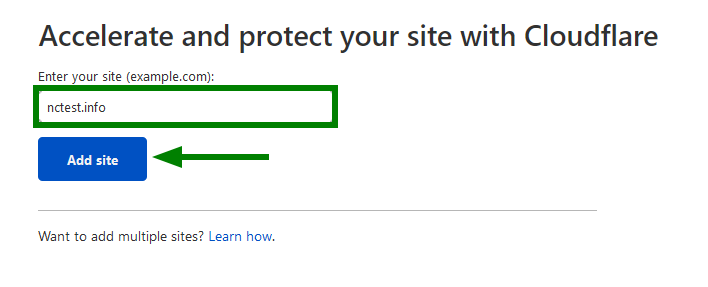
🔹 Step 1: Create a Free Cloudflare Account
- Visit Cloudflare.com and sign up for a free account.
- After logging in, enter your domain name (e.g.,
example.com) and click Add Site.
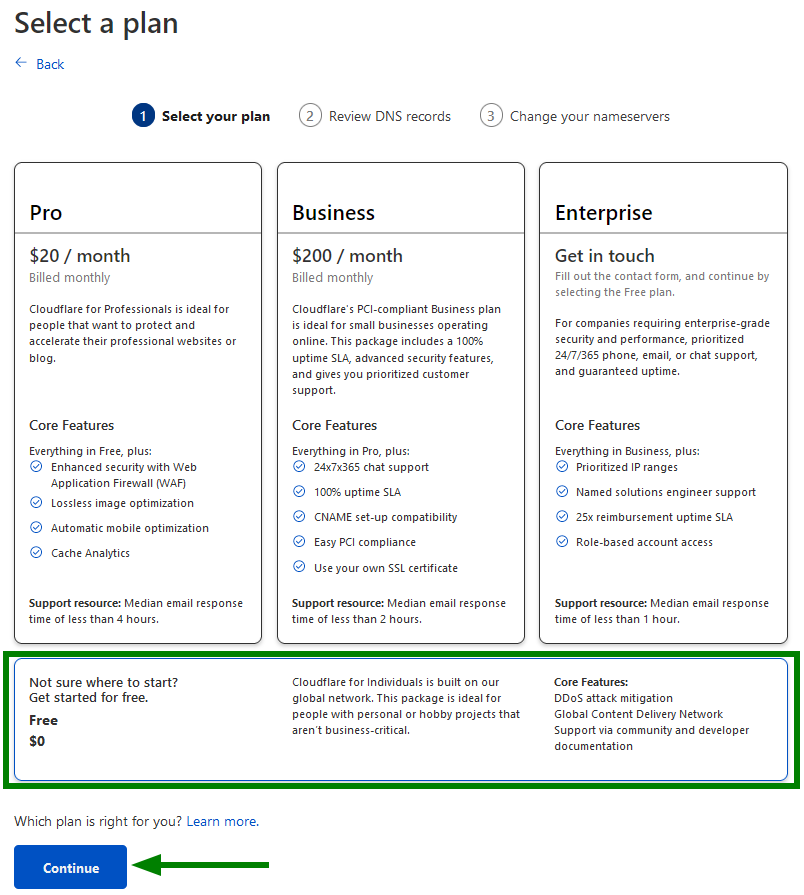
🔹 Step 2: Choose a Cloudflare Plan
- Choose the Free Plan for basic security and performance.
- Click Confirm Plan to proceed.
🔹 Step 3: Review DNS Records
Cloudflare will scan your current DNS records (A, CNAME, MX, etc.).
- Double-check these records match what’s in your cPanel at MH Host BD.
- Don’t worry — you can edit them later.
- Click Continue.
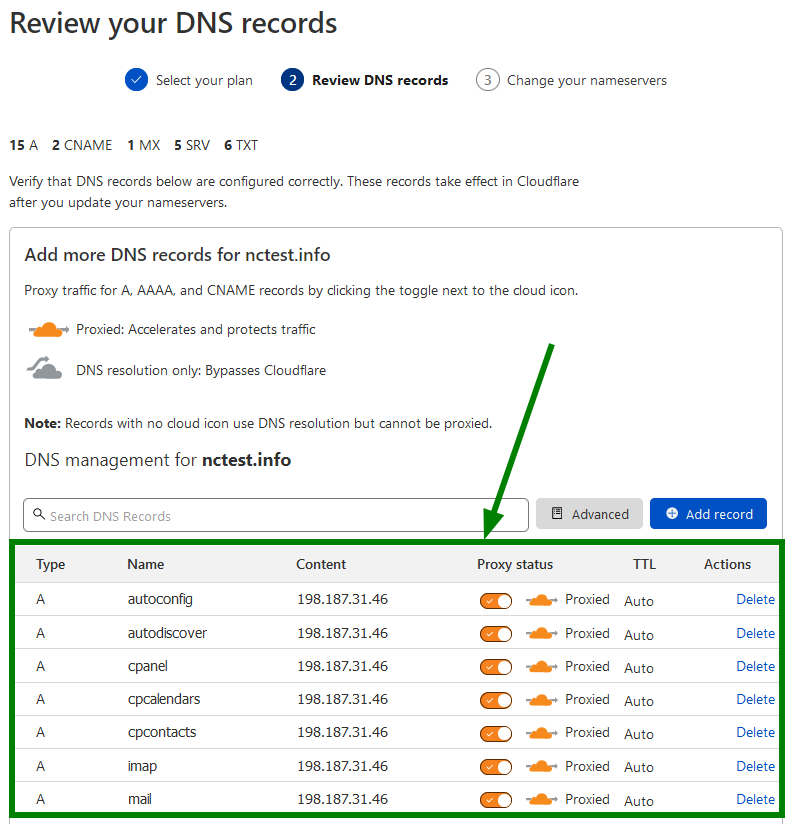
NOTE: It is not recommended to modify DNS records at this stage as you will be able to do this after the setup is complete.
If records shown in the list are correct, you can scroll down and click Continue:

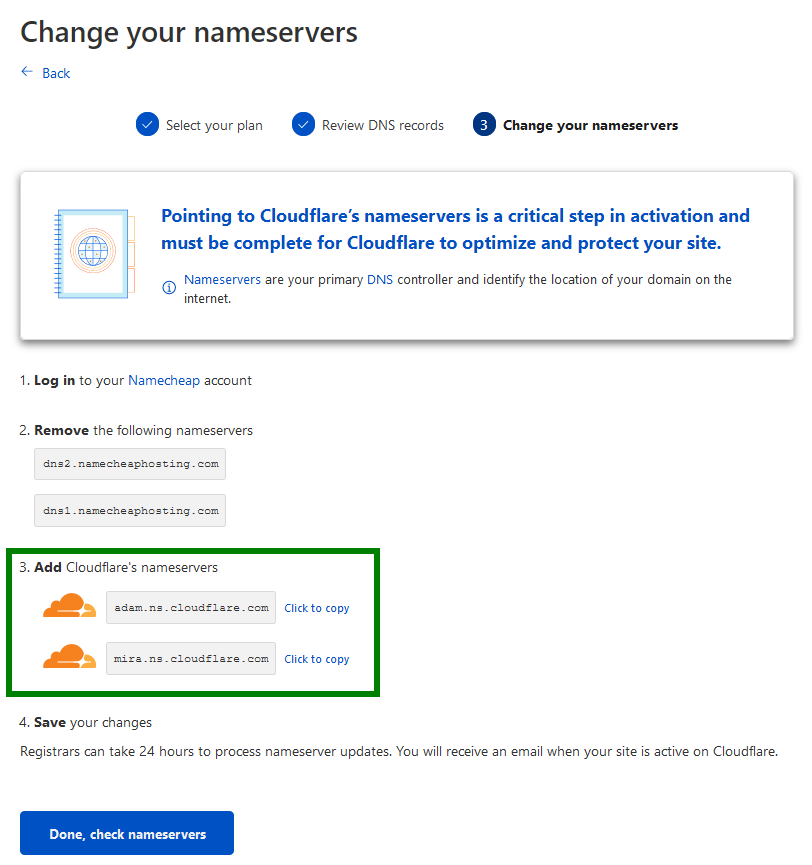
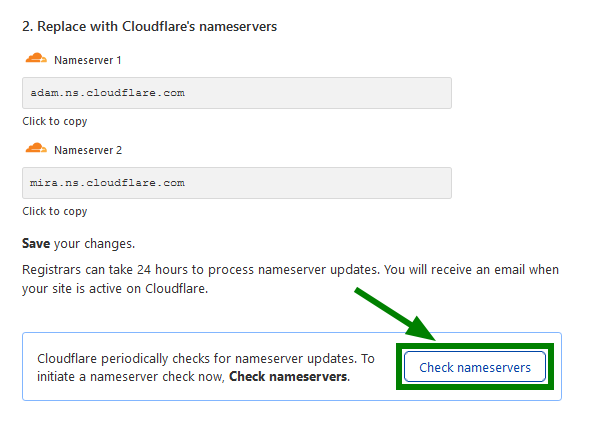
🔹 Step 4: Update Nameservers to Cloudflare
Now Cloudflare will show two new nameservers.
You must change your current domain nameservers to the ones provided by Cloudflare.
✅ If Your Domain is Registered with MH Host BD:
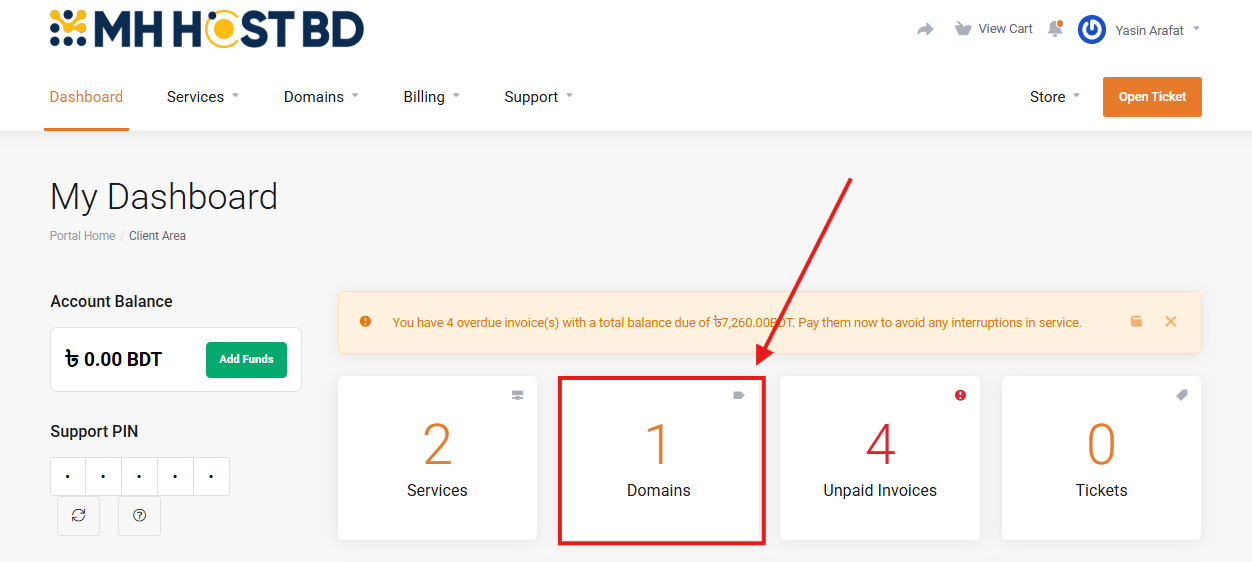
- Log in to your MH Host BD Client Area.
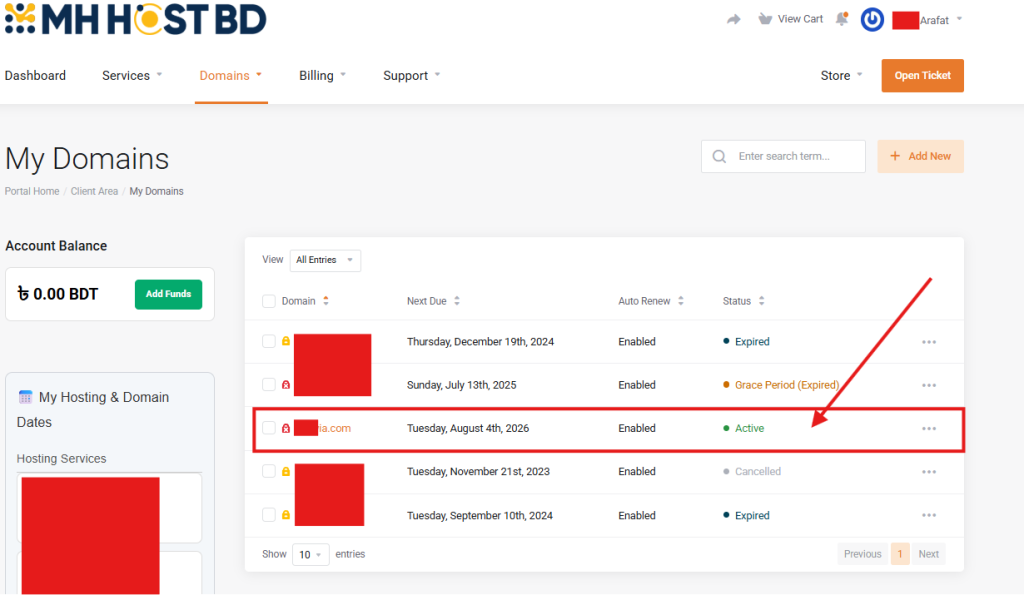
- Go to Domains → Click Manage Domain.
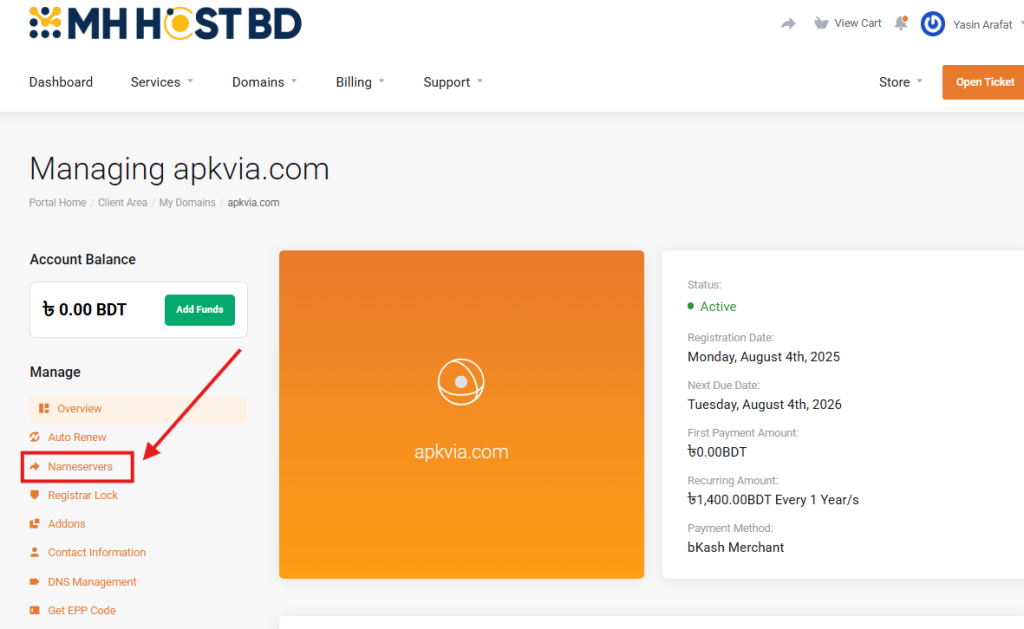
- Click the Nameservers tab.
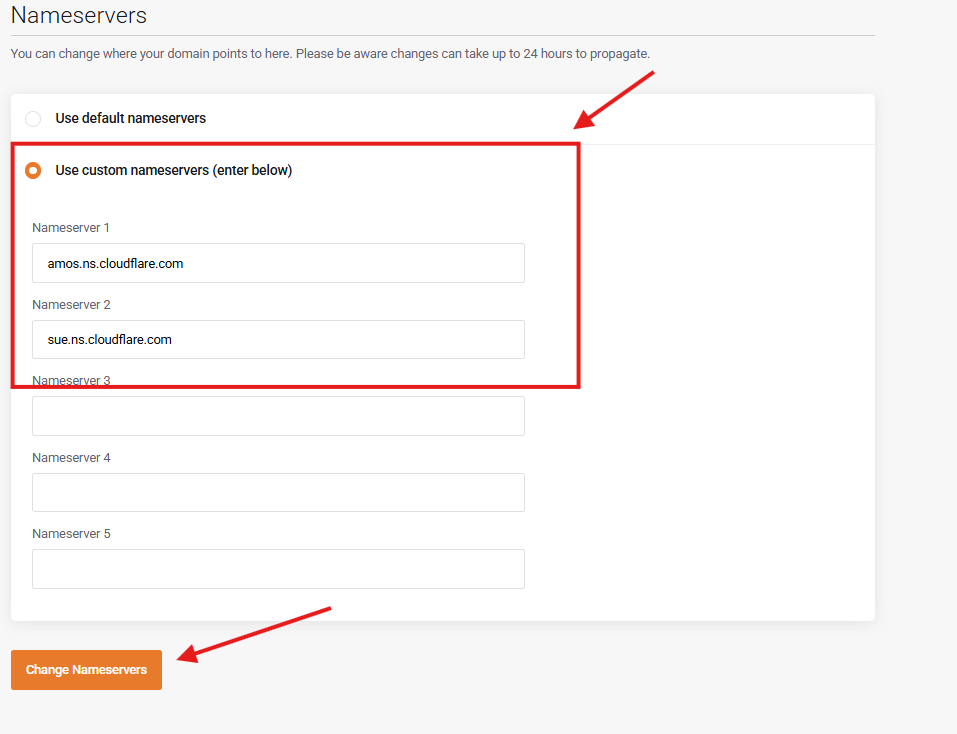
- Select Use custom nameservers (enter below).
- Enter the two Cloudflare nameservers.
- Click Save Changes.
⏳ Wait for DNS Propagation
It can take 24–48 hours for nameserver changes to take effect globally.
Once updated, go back to Cloudflare and click Check Nameservers.
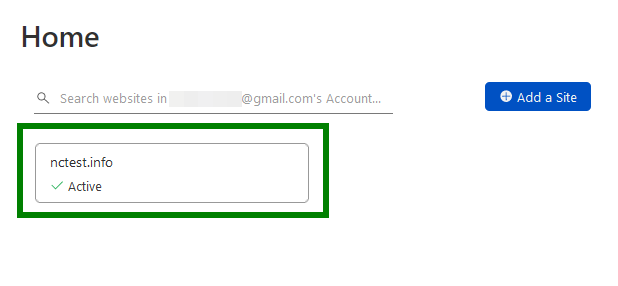
When verified, your domain will show as Active.
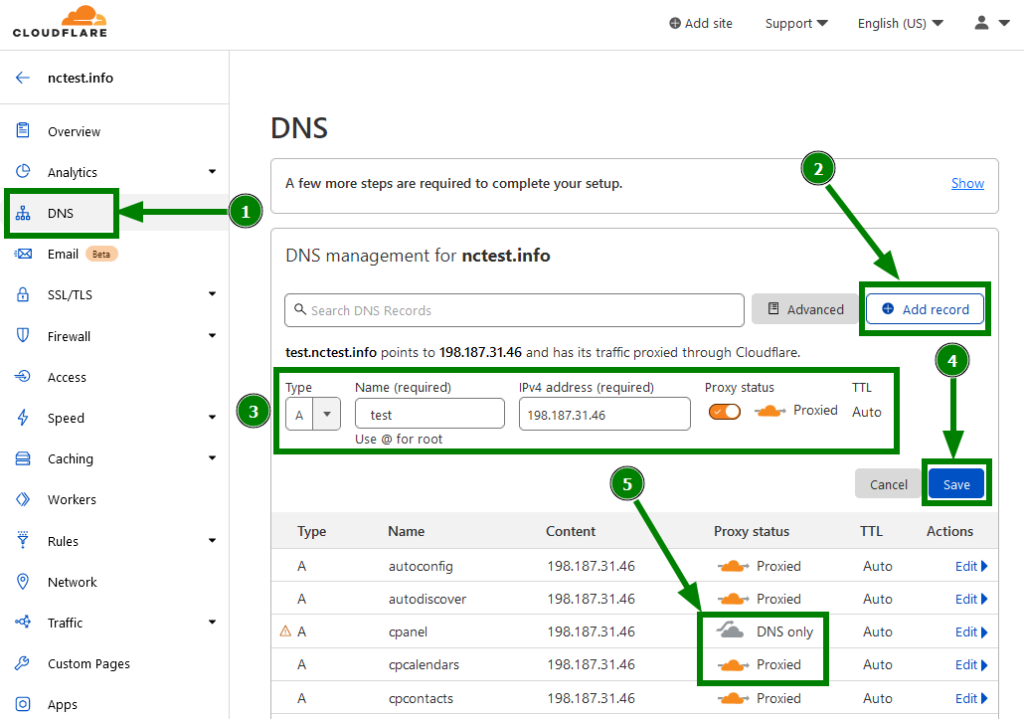
🌐 Final Step: Configure DNS in Cloudflare Dashboard
- Go to the DNS tab in your Cloudflare dashboard.
- To add records, click + Add Record.
- Choose your record type (A, CNAME, MX, etc.).
- Add your domain/subdomain and destination (IP or service).
- Click Save.
You can toggle Cloudflare protection by clicking the orange or grey cloud icon.
⚠️ Important Note for MH Host BD Clients:
After switching nameservers to Cloudflare:
- Your domain’s old cPanel DNS settings won’t be used anymore.
- Make sure to add/update your MX, A, and CNAME records directly in Cloudflare.
For example:
- If you change your website’s hosting IP, update the A record in Cloudflare.
- If you’re using email services like Zoho or Google Workspace, update the MX records.
🎉 You’re Done! Cloudflare is Now Active on Your Domain
Congratulations! Your domain is now protected and optimized with Cloudflare.
💡 Need help?
MH Host BD support is available 24/7 to assist you with DNS setup, Cloudflare configuration, or any web hosting issues.